Hi everyone! It’s been a while (as I promised). The third prototype Laser Harp is now complete!
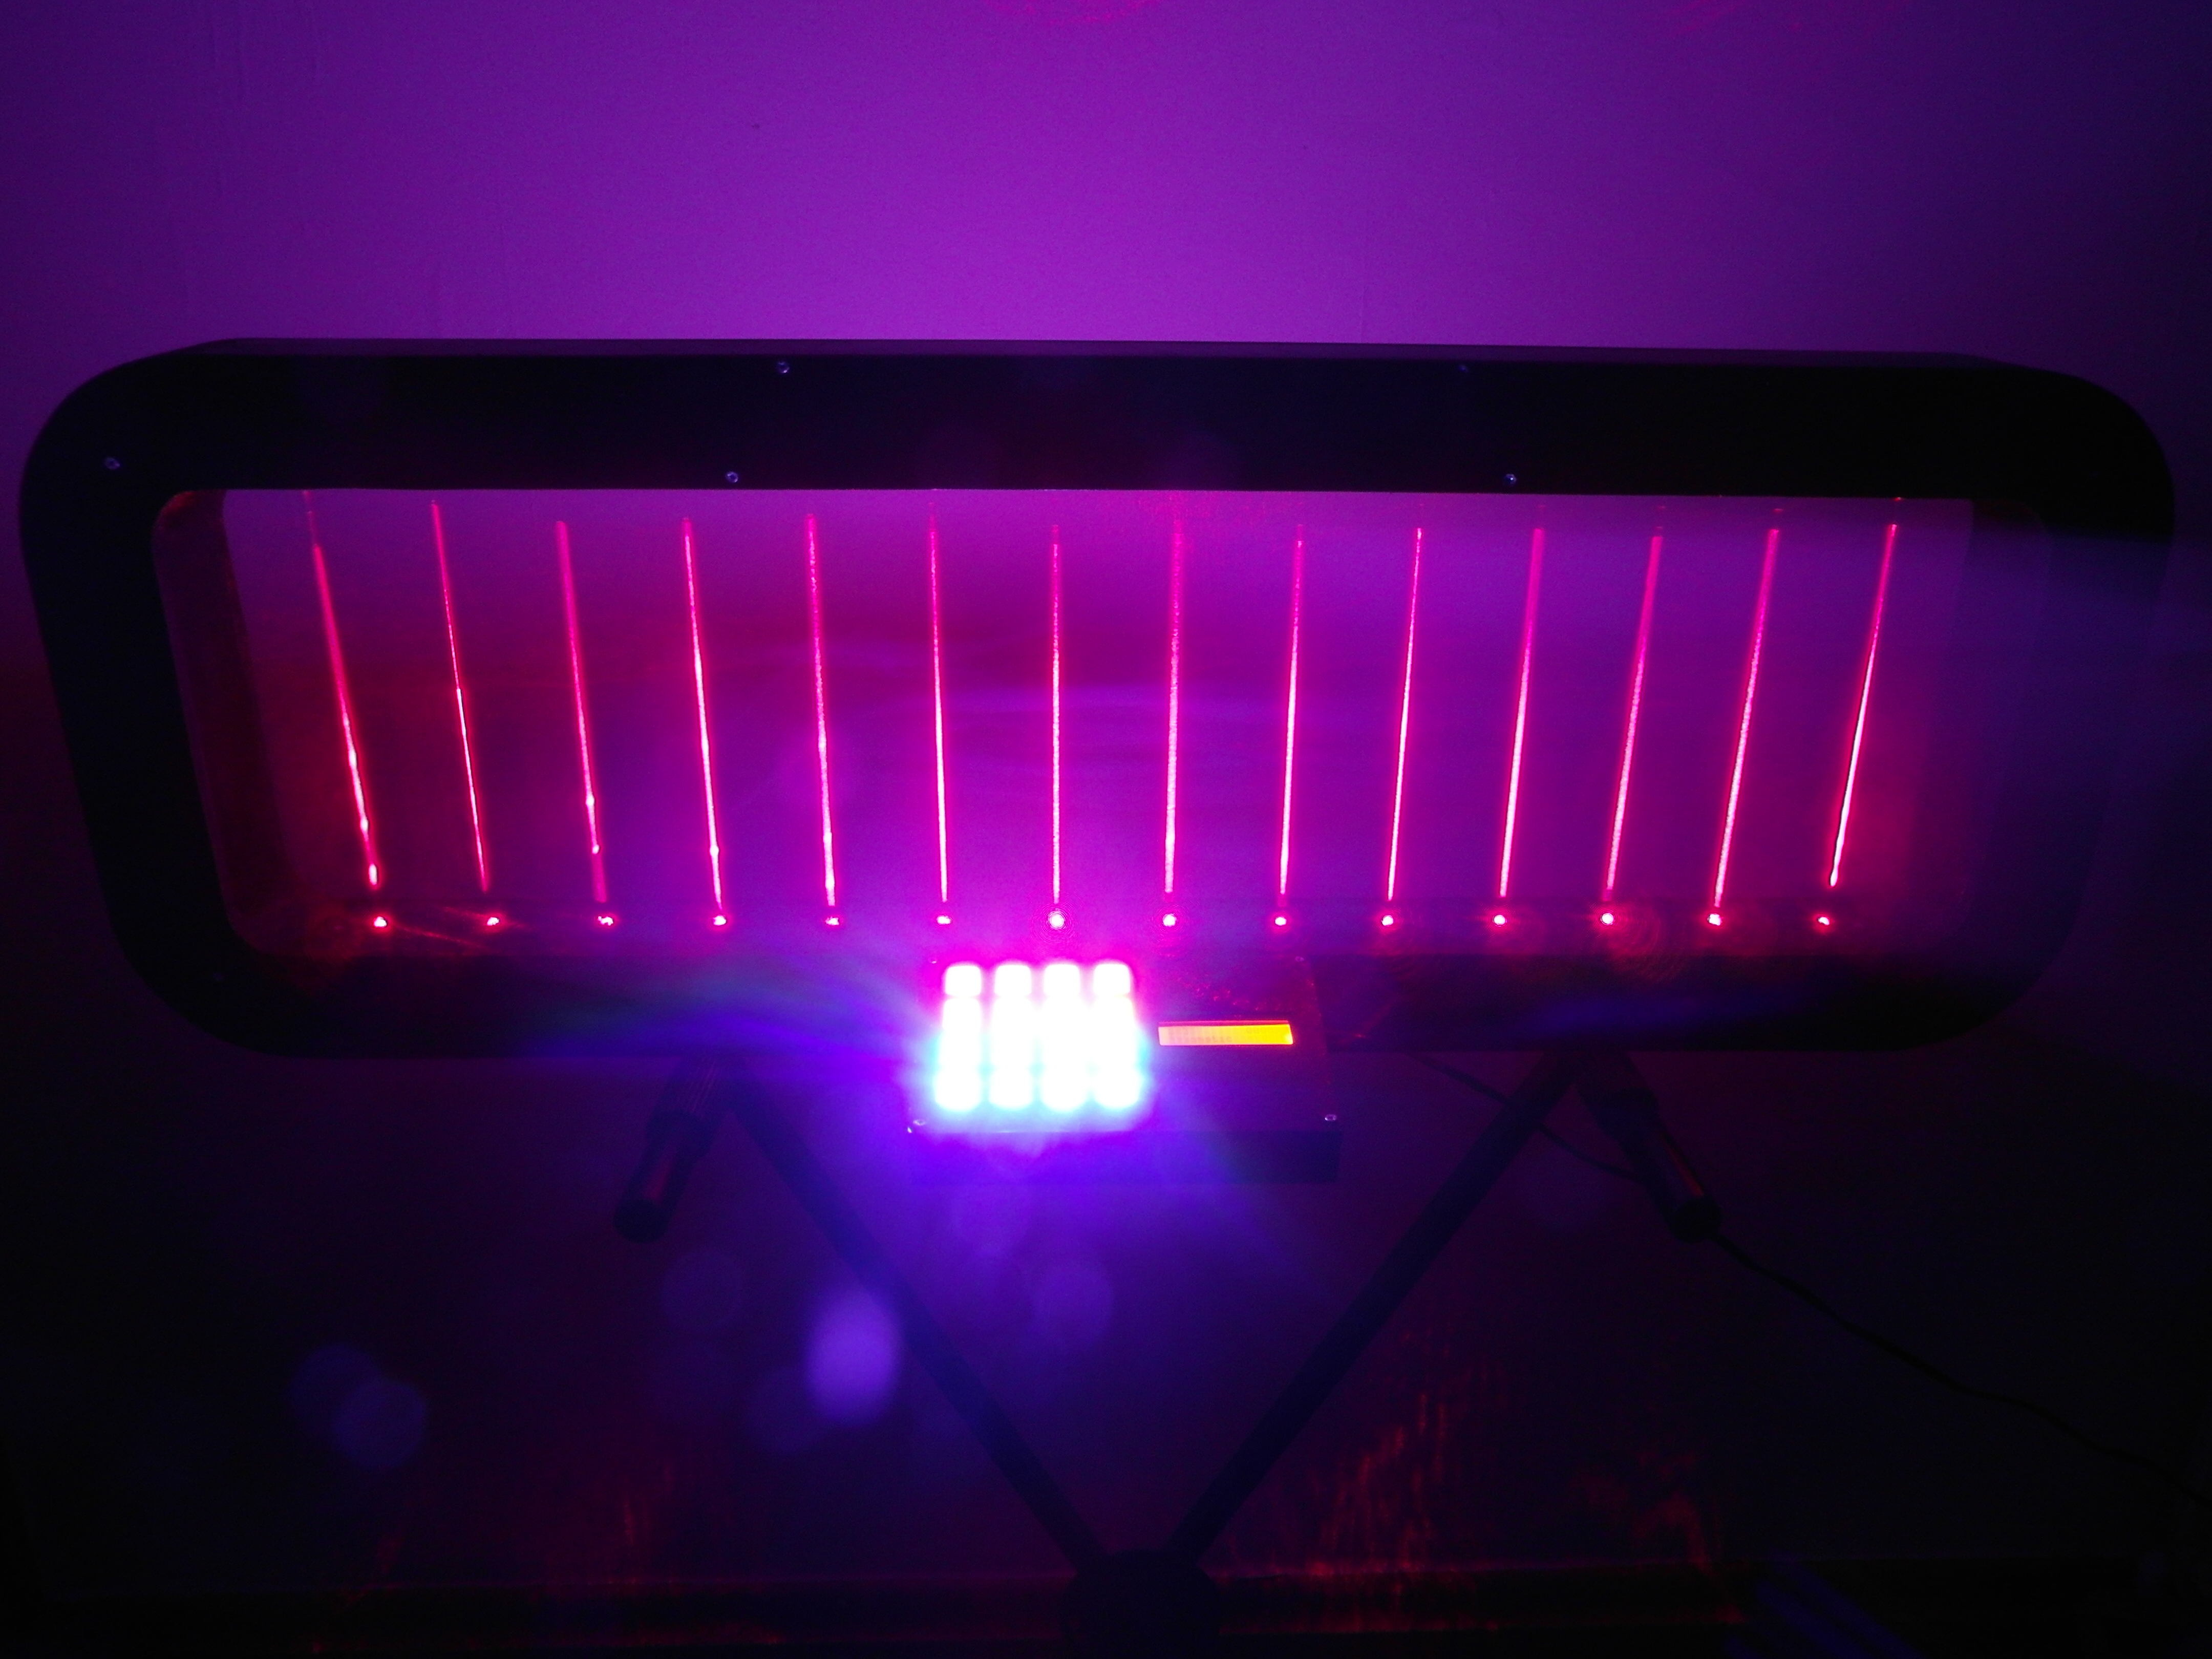
Long exposure, with beams highlighted by a sheet of white paper
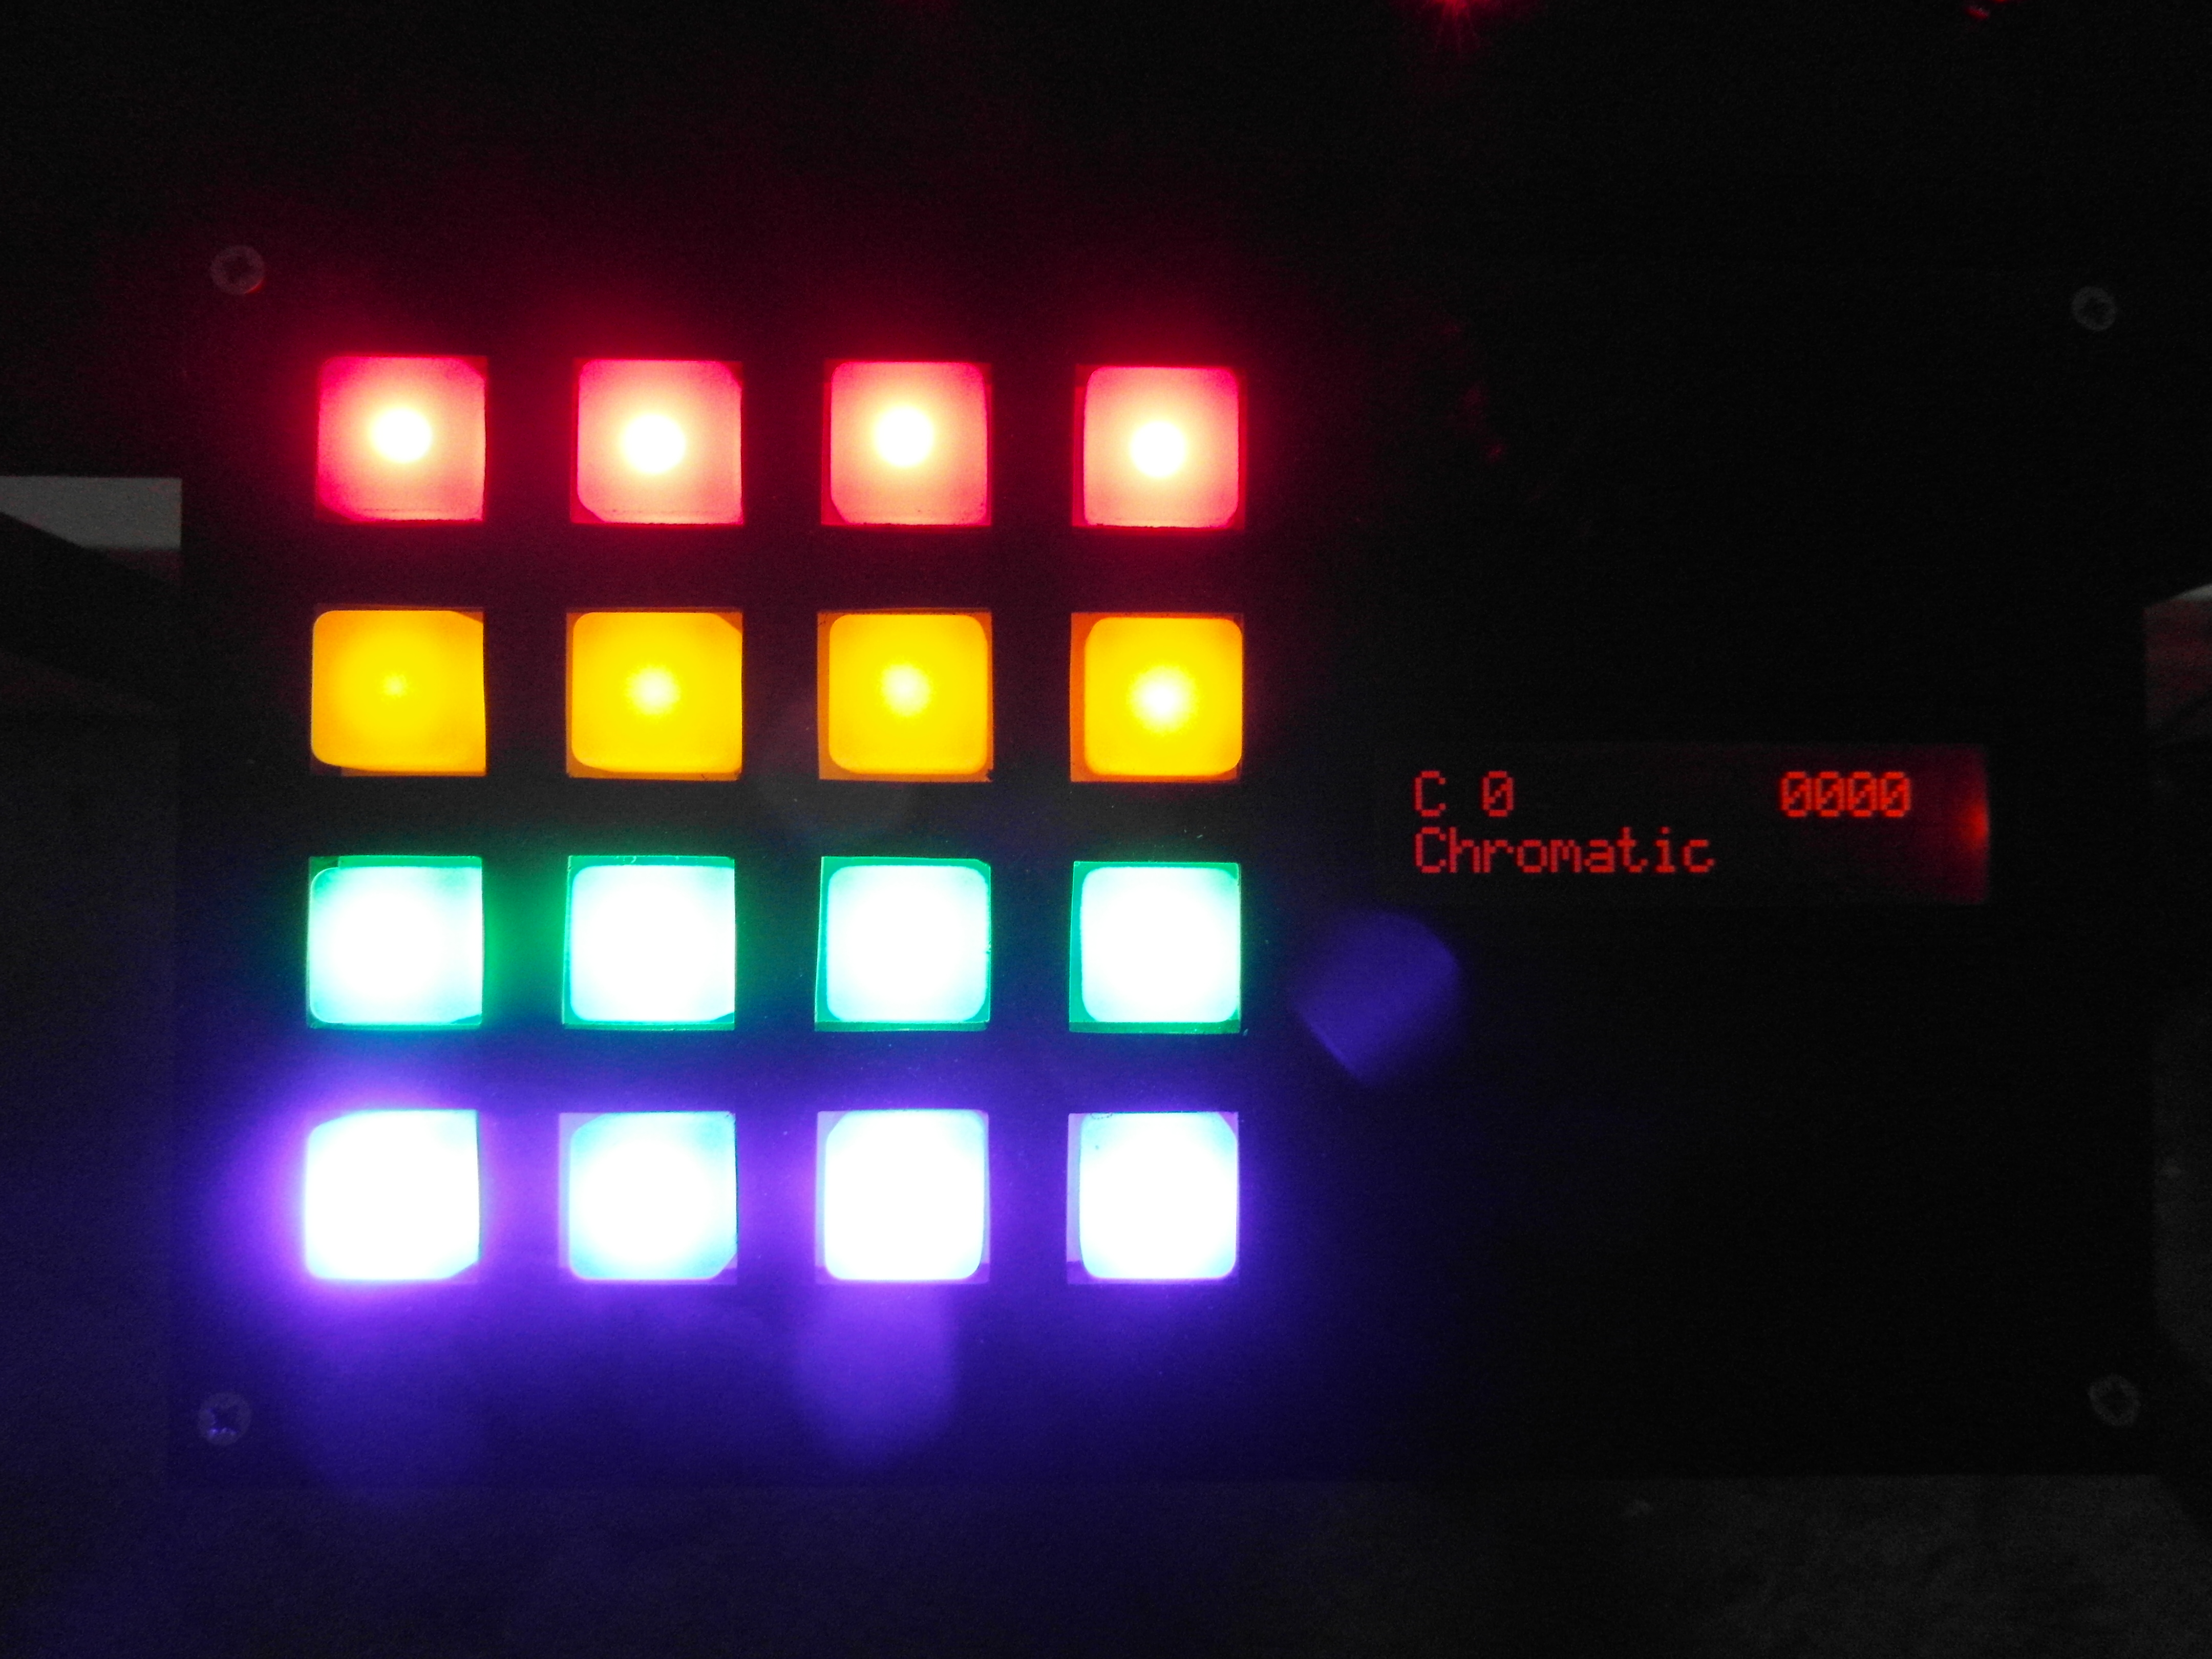
The main changes are:
-It’s bigger (20% larger)
-More buttons! I’ve used one of these (https://www.sparkfun.com/products/8033). Mostly these are used to control key changes, but the bottom row send MIDI control change messages
-LCD display to show key & scale (http://www.coolcomponents.co.uk/catalog/16×2-display-p-944.html)
-Improved velocity detection
-Improved calibration function (badly calibrated triggers display on the lcd)
-Olimexino STM32 instead of Arduino Uno (https://www.olimex.com/Products/Duino/STM32/OLIMEXINO-STM32/)
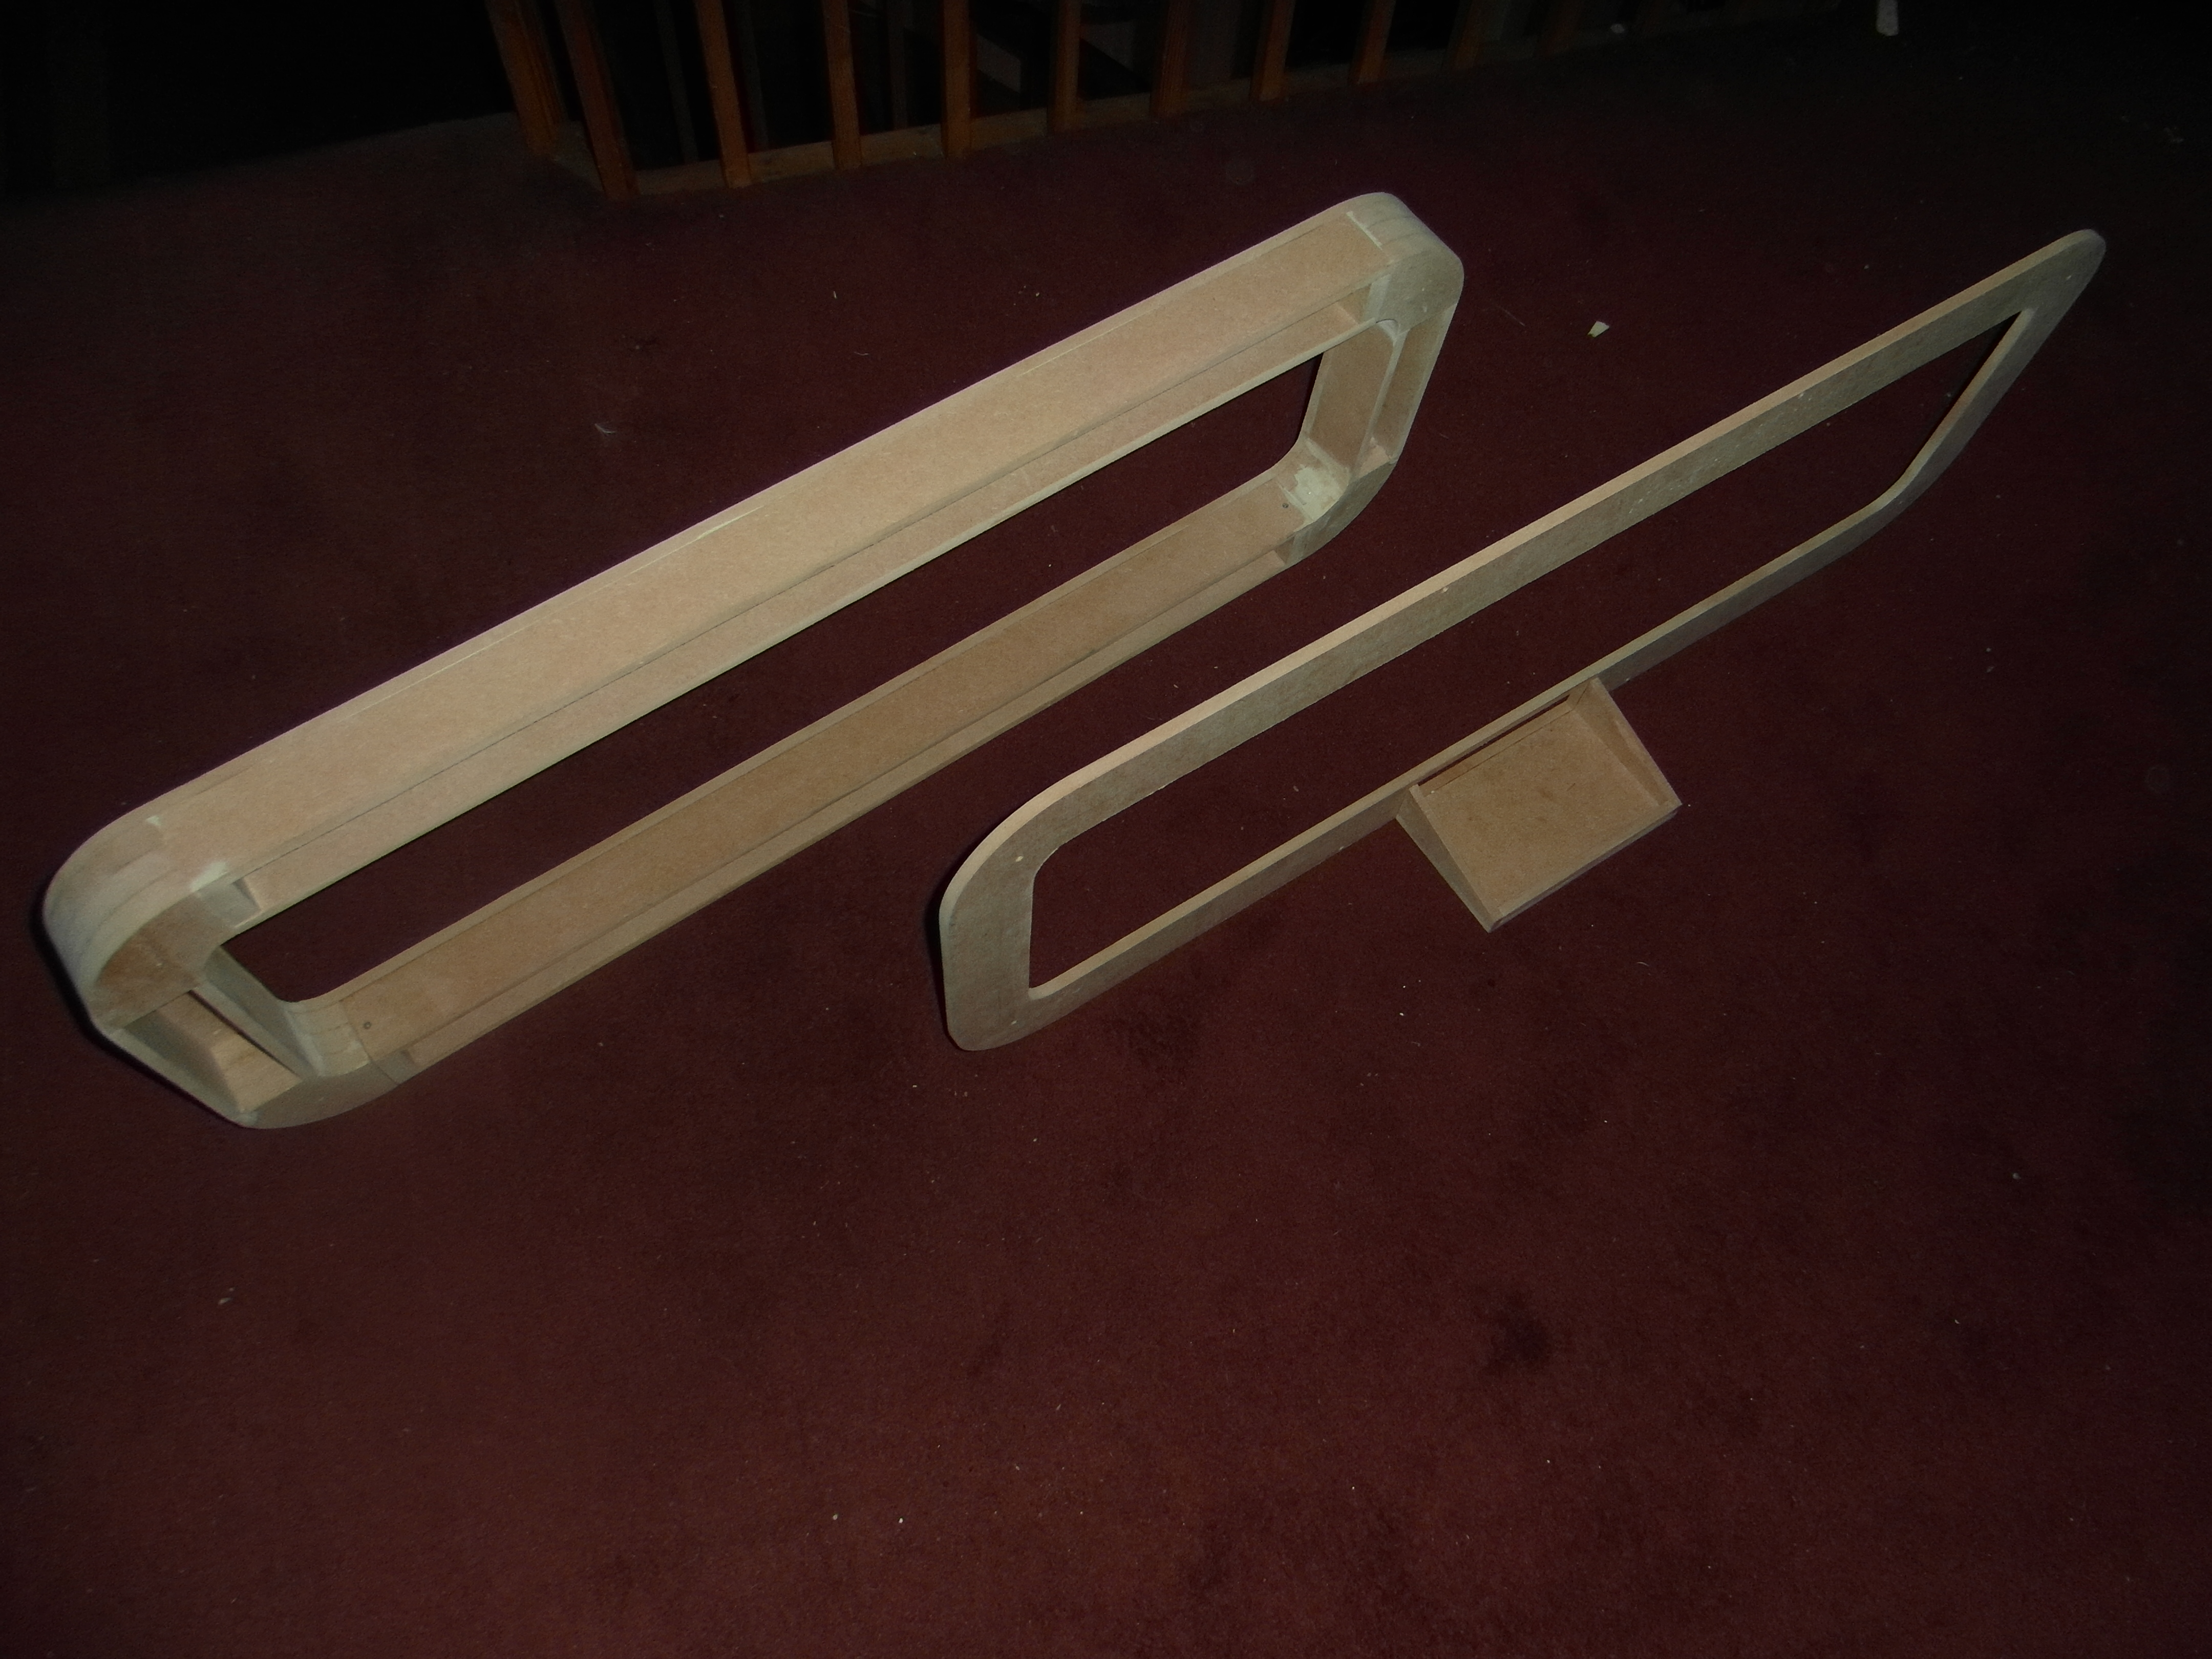
MDF construction
The frame is an mdf construction (shown above), with a final finish of matte black paint, about 6 coats over as many days.
I’ve included a few more images of construction below:
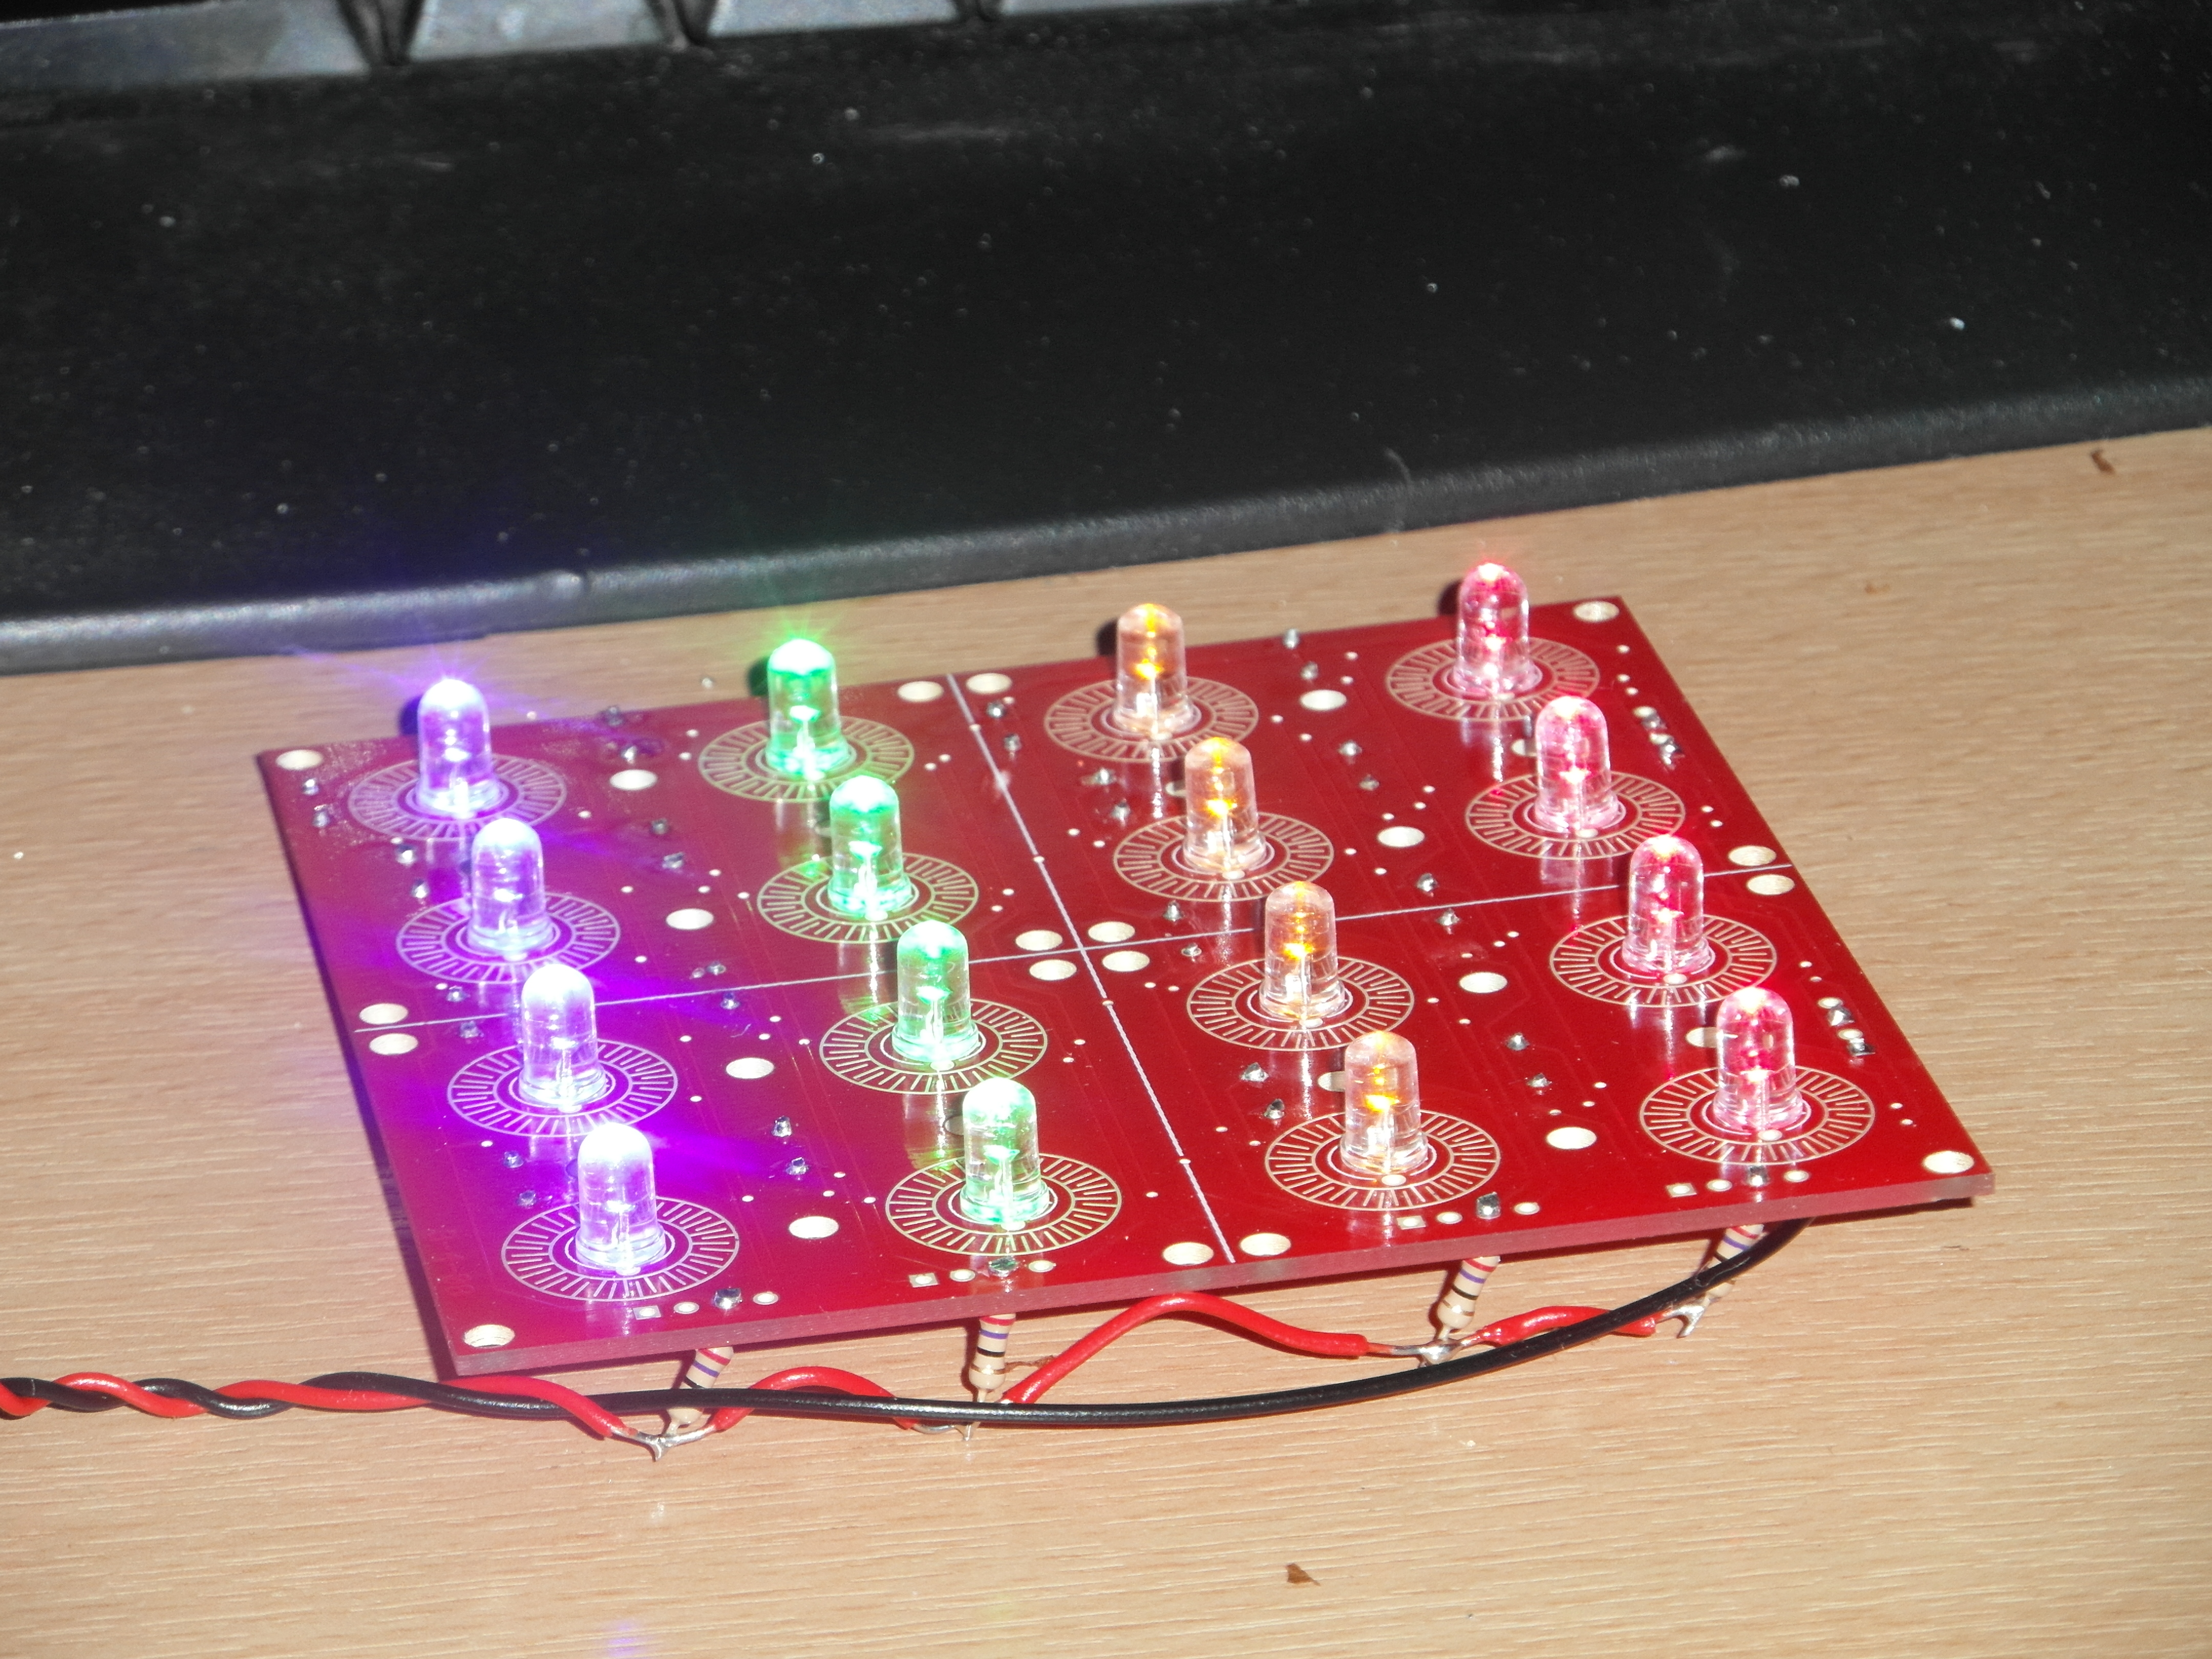
LEDs installed on button board

Button board with translucent rubber cover
All in one piece
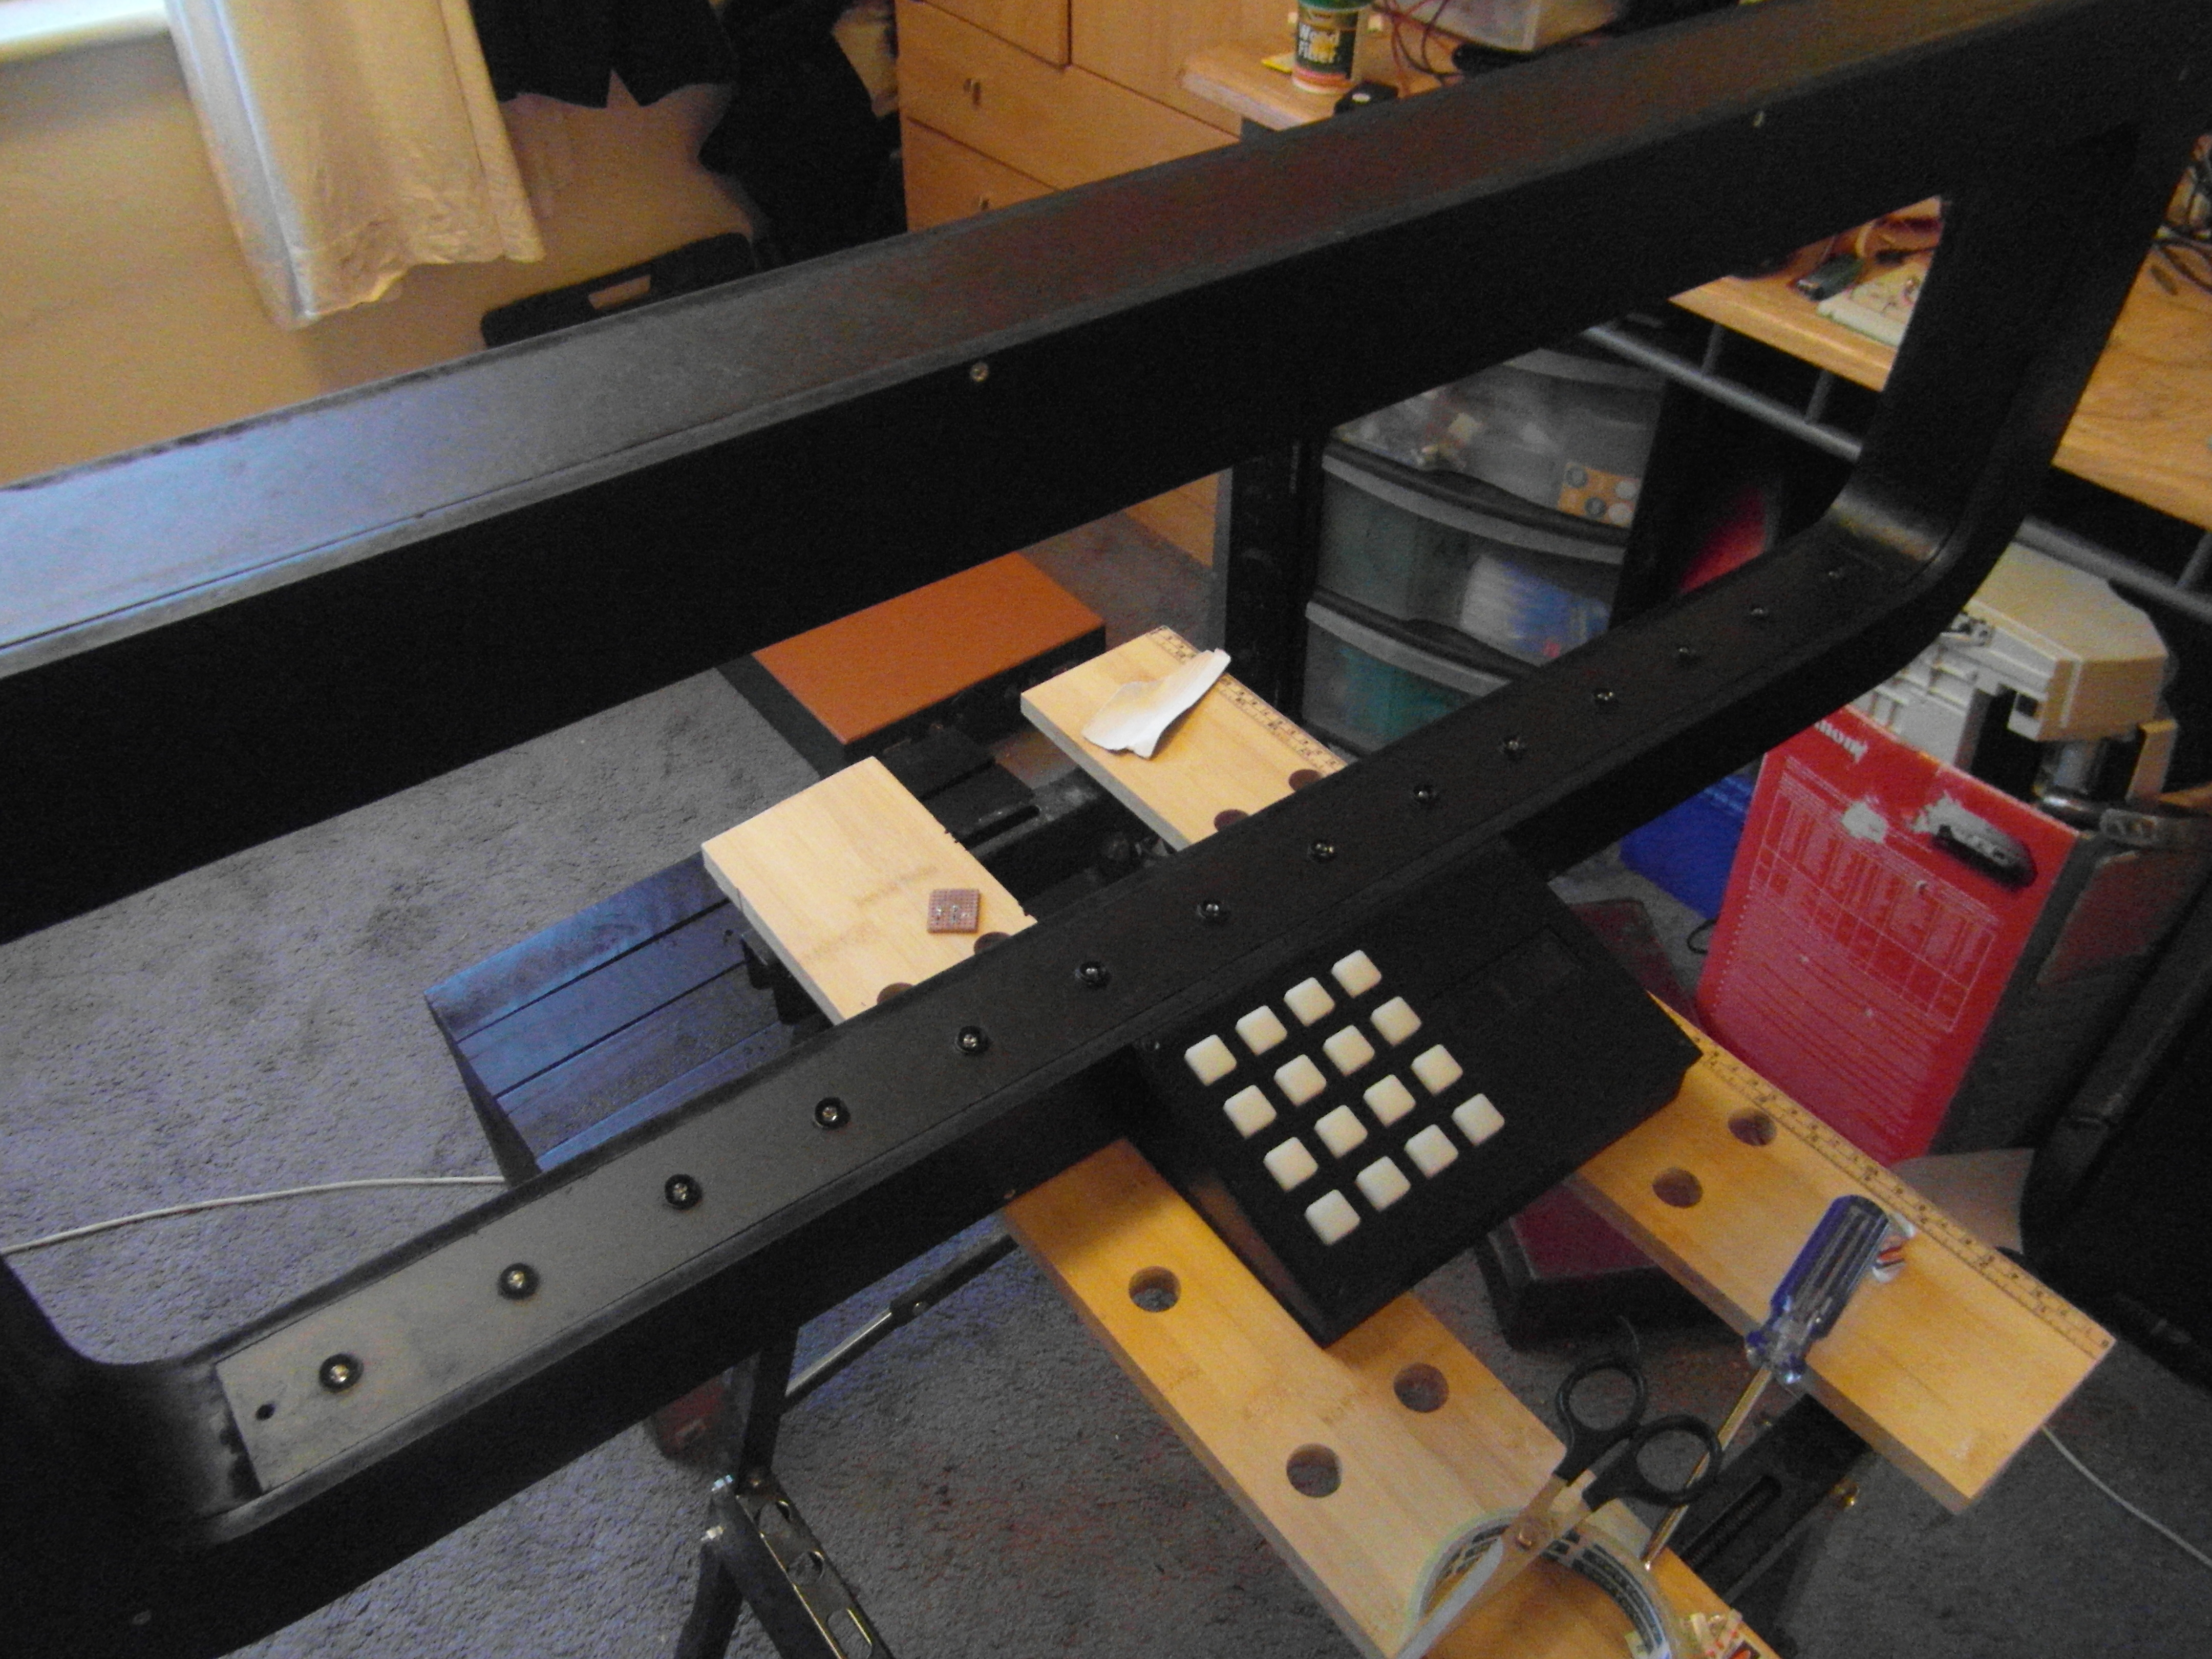
The control panel
There’s also a video on youtube, if you’d like to see it in action:
[youtube http://www.youtube.com/watch?v=FKAZhhargLg&w=560&h=315]
This one will shortly be given to Lostrites (http://www.myspace.com/lostrites), for a kind of beta evaluation – they will use it for a while and get back to me with any changes they’d like to make (added scales, functions, potentiometers etc.). I’d like to thank them for financing this project (and their patience).
As usual, if this is of particular interest to you, just get in touch and I’ll be happy to supply more information about how this was made (code, schematics, etc.).
I’ve yet to become any good at playing it, but hopefully we’ll get some video of it being used for musical performance before too long.
Brian Cameron 9th March 2013
Nice work Chris.
chrisballprojects 10th March 2013
Thanks Brian! How are the pedals?
Brian Cameron 10th March 2013
I’ve had to take a break on the pedals to do some upgrades in my studio. I’m debugging 48 channels of I/O @ 96k and a new custom pair of 3 way studio monitors bi-amped with 900 watts of vintage power. The little control room monitors are fine for mix down but I needed something bigger to play with. I’m almost done and will get back to the pedals soon.
Baz de Sylva 24th April 2014
Chris, this has been a great help being new to Arduino. I play with an orchestra in Brisbane, Australia and have been asked to build a framed harp for a concert in August. I need 12 notes so can I use a diode/ldr on digital pins 2-13? Output goes to a Roland Sound Canvas Midi Player. I can work out the construction but struggle with the code. If you could suggest the code for one note per pin that would move the project along for us and be so helpful. Thanks again for your pages.
chrisballprojects 26th April 2014
Hi Baz! You could use pins 2-13, but they’re digital IO only – you’ll need to set up your LDRs carefully to get a tidy signal. I’ve always used one of the analog inputs with a multiplexer instead of using the digital pins.
re: the code, I’d be happy to suggest something, but it would be good if you could email me with your requirements (chrisballprojects(at)gmail.com)- do you need your notes in a particular key, or is a chromatic scale okay? Which octave and note would you like it to start on, or would you prefer to adjust these on the fly?
let me know – I have no code that uses the digital pins atm, but it would be a matter of minutes for me to put some together.
Matt T 30th June 2014
Hey bro,
Absolutely love this rig you’ve assembled. Probably the best DIY one i’ve seen. I was just wondering what circuit board you are using for the buttons and how you did the wiring to your arduino?
If you don’t want to reveal your trick of the trade…I complete understand.
Once again, awesome job!
Matt
Brisbane, Australia
chrisballprojects 4th July 2014
Hi Matt,
I’m using sparkfun’s button boards (search: “sparkfun 4×4 button”), and using two small multiplexers to access them all from 4 pins on the arduino. Search “multiplexing button arrays” or similar to find tutorials on this subject (or email me at chrisballprojects [at] gmail.com and I can send schematics).
vanessa 6th May 2015
Hello Chris!
This project is beautifully done! I was curious though about the laser’s and the receptors. What kind of laser modules are those and how did you manage to find photoreceptors that didn’t take in extraneous light. Also, is the distance between the source and receptor variable to a meter? Thank you so much and I applaud you on this beautiful design.
-Vanessa
chrisballprojects 6th May 2015
Hi Vanessa,
Thanks you! The laser modules are from a chinese supplier – http://www.dinodirect.com/red-laser-module-focusable-dot.html.
The Photodiodes used are OSRAM SFH213 – You can get them from a number of suppliers. They have a very narrow angle of sensitivity (10 degrees). Direct laser light is a lot brighter than most ambient sources, so after tuning there isn’t too much of a problem with ambient light. You should be able to extend the range to as many meters as you want, provided the whole rig is very stable. Get in touch on my gmail address if you want any advice!
-Chris